
Gigapixel Photography
The Stitching Technology Used to Create My Gigapixel Fine Art Photography
My photos’ record-setting resolutions are achieved by seamlessly stitching together hundreds of individual focus-stacked images of a scene. As illustrated below, each individual focus-stacked image is only a small section of the scene and is typically 45 megapixels in size. Over the past 6 years, I have perfected the techniques needed to do focus bracketing and stacking of sets of images to provide ultimate depth of field. Each 45-megapixel focus-stacked image that eventually gets stitched into a final image may consist of 10 to 50 images focused in steps from the nearest object to the furthest object in the scene. I then composite these 10 to 50 images together to create a final image that is perfectly in focus throughout the image. Once the focus stacking is completed, anywhere from 30 to 560 focus-stacked images are then stitched together to form the final image. The result is a photo of the entire scene, tack-sharp from foreground to background, with a resolution that can be 1.0 to 15 gigapixels. (A 1 gigapixel image is 1,000 megapixels.)
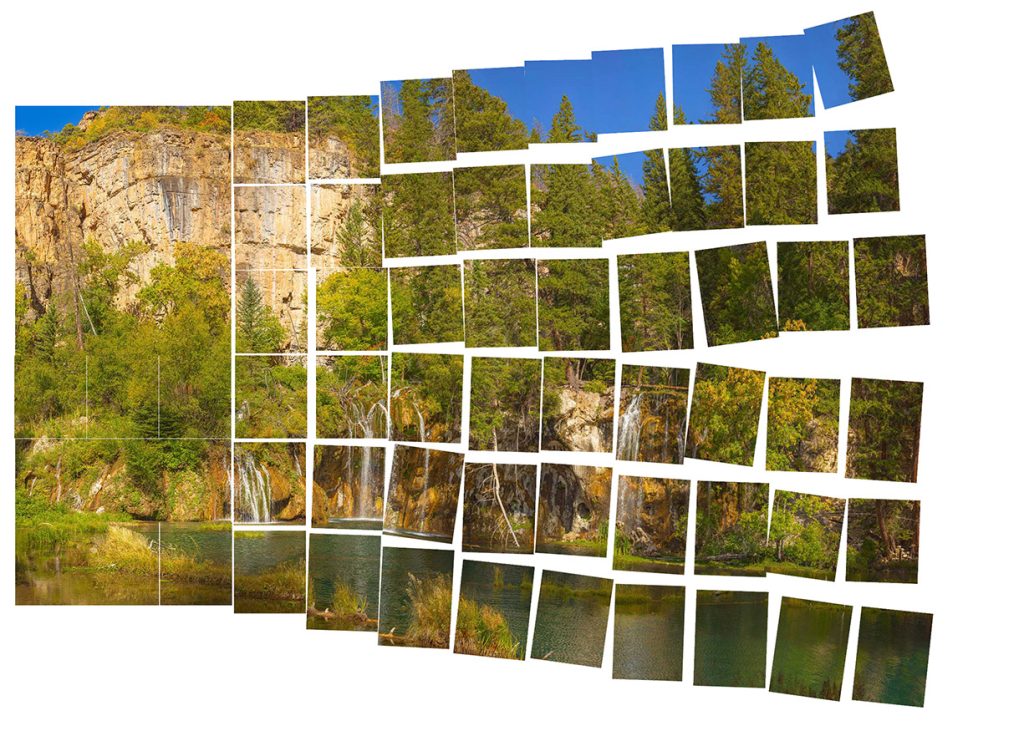
As a side note: Many photo-editing programs such as Photoshop, Topaz AI and others all have the capability to enlarge images. What these programs do is utilize AI (I like to call it Artificial Ignorance) to create additional pixels in between the original pixels. The program makes a guess (SWAG) as to the luminance and color these new pixels should be and assigns the estimated values to the new pixels. The result is an image that has an out-of-focus or fuzzy appearance. It may look OK from 8-10 ft. away but if you get up close it looks bad. This method is used by virtually all of the wall mural companies to enlarge standard resolution photos to fit a full-sized wall. I NEVER use this type of method to make my photos. All of the pixels in my photos are real coming directly from the camera just as it captured God’s magnificent Creation.
In this video, I compare one of my real gigapixel images with one generated using Topaz Gigapixel AI.
The Gigapixel Difference
The following graphic illustrates how much bigger a multi-gigapixel image is than a standard photo. All of these sizes are based on a resolution of 300 PPI (pixels per inch). The visual resolution of the human eye is about 1 arc minute. At a viewing distance of 20″, that translates to about 170 PPI. If you want to lean in closer, say to 10″, and still not see the pixels, then you would need to double that resolution to 340 PPI.
What this means is that if you were to stand 1 foot away from one of my 300 PPI wall mural photos, you could not perceive any pixelization.
Some online wall mural sites will try to tell you that they can make wall murals from a cell phone photo. This is flat-out false. Even a 48-megapixel iPhone camera cannot take a photo that can be enlarged 45× to create a typical full-height wall mural. It will be fuzzy and look out of focus.
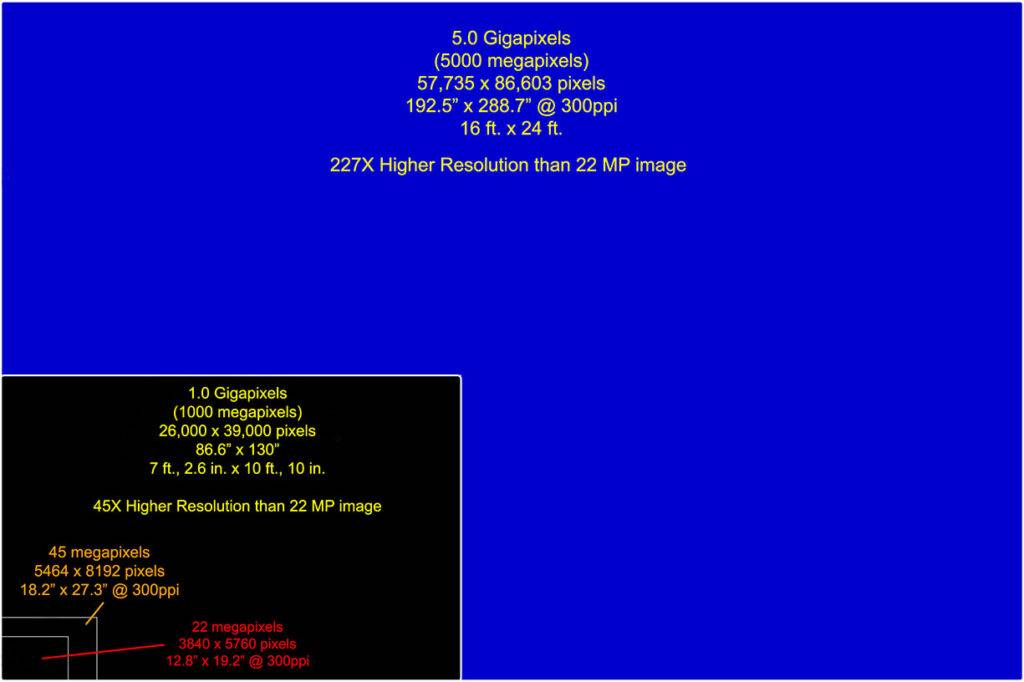
This graphic shows the size differences between typical photos shot with common DSLR cameras and my gigapixel photography images when printed at 300 PPI.
A 22-megapixel intermediate-level DSLR camera would yield a 12.8 in. × 19.2 in. print when printed at 300 PPI. A top-of-the-line 45-megapixel DSLR would allow one to print up to 18.2 in. × 27.3 in. The iPhone 16 has a 48-megapixel resolution but lacks the quality lenses available for top-of-the-line DSLRs.
One of my 1.0-gigapixel images, on the other hand, can be printed at 86.6 in. × 130 in. at 300 PPI. This image contains approximately 45 times as many pixels as the 22-megapixel image. Several of my images are 5 gigapixels (approximately 227 times as many pixels as the 22-megapixel image) or larger and can be printed at 16 ft. × 24 ft. at 300 PPI (32 ft. × 48 ft. at 150 PPI).
That extraordinary resolution can also become an interactive and interpretive resource for national parks, museums and visitor centers. Explore Gigapixel Photography for Parks & Museums →
No AI involved, ever! — I do NOT use any AI to generate my images. Only dust spot removal, noise reduction, and sharpening methods are used to clean up and edit my images. In my photography, I strive to reproduce a scene as accurately as possible—to look exactly as God chose to display His Creation at the time I was photographing it.
How Do We Achieve Gigapixel Resolution?
My gigapixel photography wall mural photos are a combination of anywhere from 50 to over 9,600 individual shots stitched together to form a final image that can measure over 15 feet high and 50 feet long at 300 PPI resolution.
It starts with a photographer who has a good eye, years of experience, and tons of patience. Any good landscape photographer spends a significant amount of time scouting locations, calculating the best time of day for the best lighting, and planning the shoot for the best angle, along with what foreground, mid-ground, and background to include. Weather, time of year, and time of day are all important factors.
Gigapixel photography adds a great deal of complexity to obtaining a high-quality photograph. Getting that sunrise or sunset shot often entails getting up hours before sunrise to be on location in time for the best light. Setting up complicated gear in the dark can be challenging.
I have been doing landscape photography for over 60 years. Over the past 15 years, I have developed a unique process for creating my gigapixel images, resulting in stunning, high-resolution, wall-mural-sized photos, some exceeding 8 gigapixels, that are among the highest-resolution photographs available for wall mural reproduction.
“The single most important component of a camera is the twelve inches behind it.” — Ansel Adams
Top-of-the-line, high-megapixel cameras, sturdy tripods, and panoramic heads are needed.
These days, I typically shoot with a 45-megapixel Canon R5 camera teamed up with a Canon 70–200mm f/2.8 lens or a Canon 300mm f/4 lens. The camera is mounted to a Nodal Ninja M2 panoramic head. This all gets attached to an extra-sturdy tripod. Altogether, this adds up to about 40 pounds in my camera bag/backpack. Definitely a load if you’re hiking up a steep trail to your chosen location.
The photographer has to have intimate knowledge of how to operate all of his gear. When shooting a sunset, he can’t afford to be fiddling around trying to get the right settings for the quickly changing light. A thorough understanding of the relationships between f-stops, focal distances, depth of field, and hyperfocal distances is required to get the optimum shot.
A super-powerful computer with a state-of-the-art CPU and GPU, vast amounts of memory, and extensive storage is required.
Over the years, I have built several of my own custom computer systems specifically designed for processing these types of images. Thankfully, my life’s career as an electronic engineer gave me the knowledge of what was needed to build such a machine.
In April 2023, I upgraded to state-of-the-art hardware and am now running a 13th-generation Raptor Lake Intel® Core™ i9-13900K 24-core, 32-thread CPU, overclocked to 5.8 GHz and cooled with an ENERMAX LIQMAX III water-cooling system. The ASUS ProArt Z790-CREATOR motherboard is populated with 128 gigabytes of DDR5 memory. The system also includes an ASUS GeForce RTX 4070 Ti GPU.
I have a 4 TB SSD as the primary drive, along with two 4 TB SSDs and a 1 TB SSD for use as scratch drives. The system has 12 hard drives with a total of approximately 50 TB of online storage. For backup, I run a Synology DS1821+ 8-bay NAS with an attached 5-bay expansion unit, providing a total storage capacity of approximately 180 TB. In addition, I maintain a Backblaze cloud backup of all the hard drives in the system.
Why Does Gigapixel Photography Result in Superior-Looking Wall Murals?
There are numerous online suppliers of wall murals. The majority of photos used to make these murals are derived from a single image shot with a digital camera or even a cell phone. These low-resolution images are then “upsized” using various photo-editing software. When an image is upsized, the software creates additional pixels to fill in the gaps between the original pixels. The software analyzes the surrounding pixels and, using special algorithms, makes a guess as to what color the new pixels should be. These days, these programs use AI (I like to call it Artificial Ignorance) to make these guesses regarding pixel colors.
For example, to upsize a typical 3840 × 5760-pixel, 22-megapixel photo to an 8 ft. × 12 ft. wall mural at 300 PPI, approximately 92.8% of the pixels in the final image would have to be computer-generated rather than captured by the camera. The result is a muddy, out-of-focus-looking image. These AI-generated, upsized images simply cannot compare to true gigapixel photography. As the old saying goes, “Garbage in, garbage out.”
The AI-generated image may look “OK” when viewed from more than 8 ft. away from the mural. My gigapixel photography wall murals can be viewed from less than 2 ft. away and still have the appearance of a high-quality photograph. My photos are so sharp and clear that many people have said they feel as if they could walk right into the photo.
Mastering the Learning Curve
Over years of practice and experimentation, I have refined every step of the gigapixel photo creation process. Many of my first efforts were met with frustration and hundreds of gigabytes consumed on my hard drive. I quickly discovered that all the details involved in making sure exposure, focus, and composition are perfect for a single image were multiplied by the fact that now I had to have thousands of images all perfect.
However, after many failed attempts, I refined the knowledge and techniques needed to produce multi-gigapixel images that capture our Creator’s handiwork in a way that is worthy of Him. These days, I have perfected the ability to capture focus-stacked images that can involve over 9,000 focus-bracketed images, yielding finished images of 15 gigapixels and larger.
I invite you to view them and enjoy some of the beauty our Creator made for us.
Location Scouting & Image Pre-Visualization
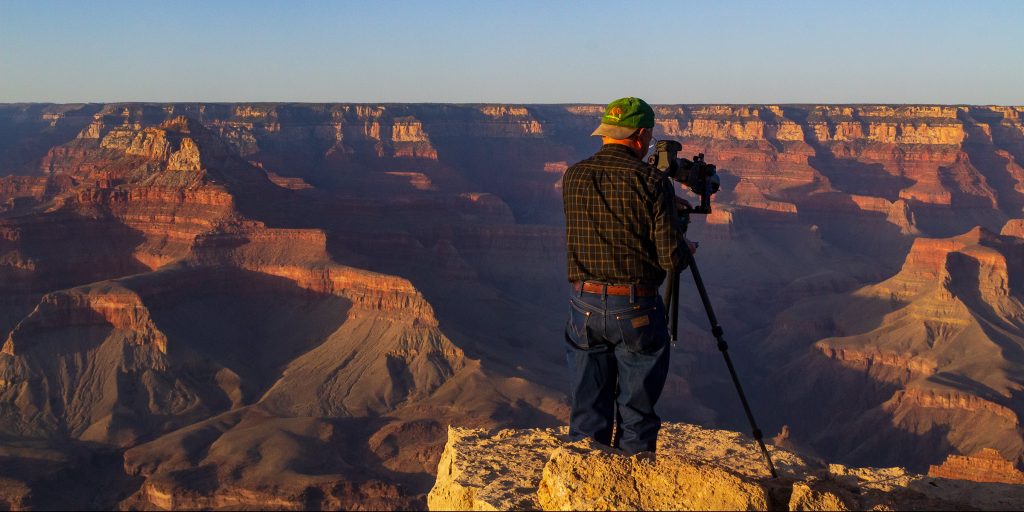
Every photo starts with a great deal of location scouting and brainstorming. For any given subject, there are countless different angles, perspectives, and conditions to consider. I plan for a time to shoot the photo with a keen awareness of how the scene changes depending on the weather, the time of day, and the time of year. Even small changes in lighting, timing, or conditions can dramatically alter the mood of a scene. I have been known to spend hours on Google Earth and PhotoPills researching the best time of year and time of day to shoot a particular location. The rest of the process is merely working to create the final image I’ve already visualized in my mind.
Meticulous Attention to Exposure Settings
Exposing the matrix of images that will be stitched together into the final gigapixel photo can take anywhere from a few minutes to over an hour. On the other hand, sunrise and sunset shots may have only a 3–5-minute window if you’re trying to capture the alpenglow on the mountain peaks.
Unlike traditional photographs, a gigapixel photo’s exceptional resolution demands the utmost attention to detail. This style of photography requires that I calculate the hyperfocal distance and use a rangefinder to identify an object at the hyperfocal distance to focus on. Or, if I have nearby objects in the foreground, I have to set up for focus bracketing to assure I will have the sharpest possible image.
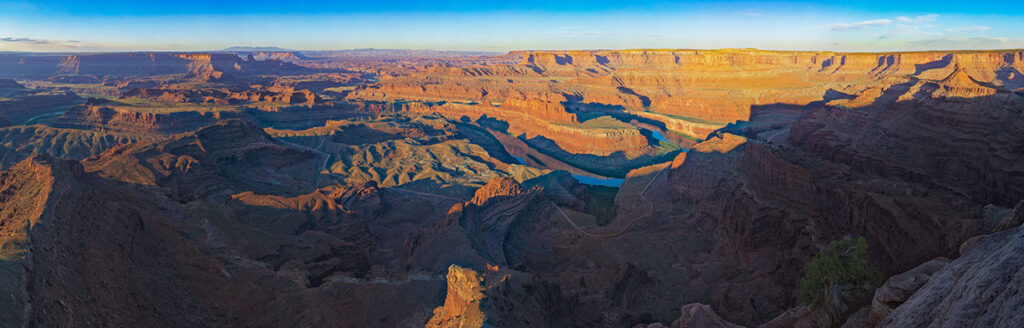
I have to account for the direction of moving objects, such as clouds, to ensure they’re portrayed accurately and/or do not affect the lighting in the scene. Scenes like the one above have a huge dynamic range of light versus dark. Intimate knowledge of the inner workings of the camera’s electronics is required to avoid overexposure or underexposure in the light and dark areas. I use ETTR (Expose to the Right) techniques to make maximum use of my camera’s dynamic range.
And for the final step, I physically lock my ISO, shutter speed, and aperture to guarantee identical exposure characteristics for every image.
The Final Result
All of this planning, specialized equipment, technical knowledge, patience, and processing has one purpose: to create photographs that preserve the extraordinary detail and beauty of the landscapes I experience in the field.
For me, gigapixel photography isn’t simply about creating enormous files or achieving record-setting resolutions. The resolution allows a photograph to become something more—an image that can fill an entire wall while retaining the fine detail of a traditional photograph, inviting the viewer to step closer, explore the landscape, and discover details that might otherwise go unnoticed.
My goal is to create photographs that allow others to experience some of the beauty of God’s Creation as I experienced it when I stood behind the camera.