Using the Promote Control with Gigapan Epic Pro To Create Focus Stacked Gigapixel Panoramas
Even a moderately telephoto focal length of 70mm @ f-11 has Hyper Focal Distance (HFD) of 48.9’. As illustrated in Fig. 1, focusing to the HFD maximizes the focal range from near to far that is “acceptably in focus”. If you focus on object 48.9’ from camera everything from 24.5’ to infinity will be “acceptably in focus”. Objects closer than 24.5’ will not be in focus. This is problem-some in the fact that good composition calls for interesting foreground subjects that need to be in focus also.
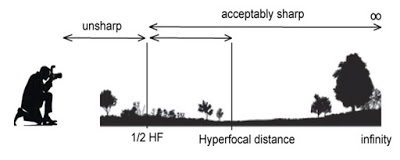
Note that in the previous paragraph I enclosed the phrase “acceptably in focus” in quotes. This term can be quite ambiguous. Tied to the “Circle of Confusion” value for your sensor size, (.03 for a full frame sensor), this is the diameter where focus is not perfect. With modern high megapixel full frame sensors this covers 4-6 pixels. This is enough to impact the sharpness when an image is blown up to 30” x 40” sizes and larger. Furthermore, Diffraction at f-stop values greater than around f-11 for most lenses also exacerbates the degradation of sharpness.
Using an f-32 stop setting would have reduced the HFD to 194 ft. and the HFD/2 to 97 ft. It would not have solved the problem in this case because the tree and bush were closer than 97 ft.. Furthermore, most lenses exhibit significant Diffraction at f-stop values much above f-11. This Diffraction will reduce the sharpness of the image. Therefore, the f-14 I used in Fig. 2, already has somewhat degraded sharpness of the final image. I shoot this photo in 2014 when I was less aware of the impact of Diffraction.
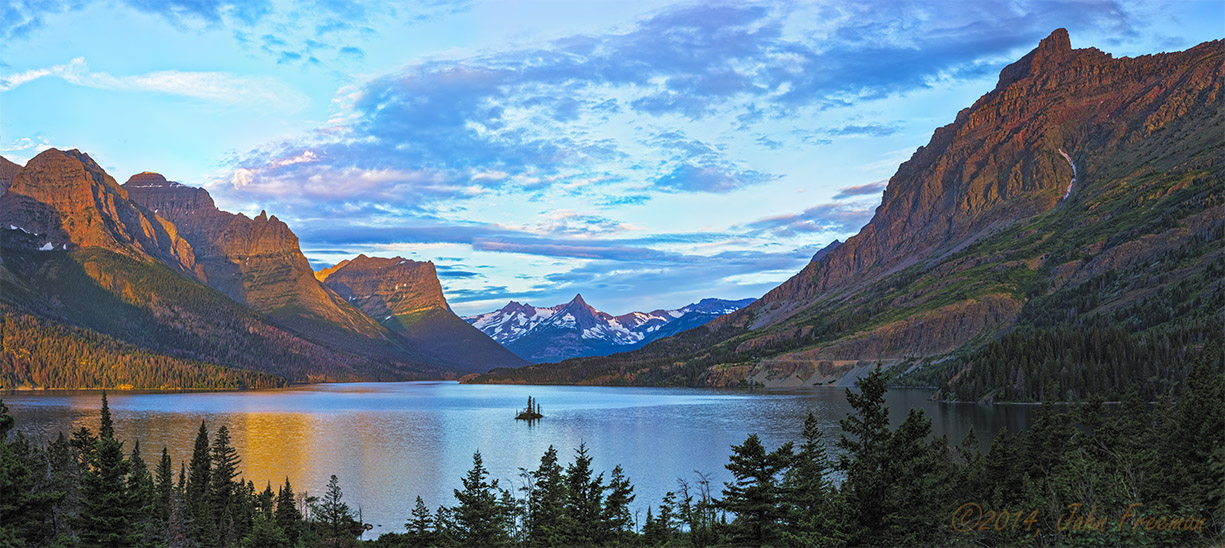
Figure 2 Wild Goose Island — Total of 85 images (5 rows x 17 columns) yielding a final un-cropped image measuring 60.6″ x 142.3″ f-14, 1/15th sec., ISO 100, focal length = 200mm
When I first started using my Promote Control with my Gigapan Epic Pro, I discovered that my Canon 70-200mm lens had a problem in that when repeating multiple focus stack sequences there was some creep in the focus position after a few sequences. The cause of this creep was due to slippage of the focus motor over time. This resulted in gradual change in the starting and ending focus points. When shooting large numbers of sequences the accumulated error became noticeable in the final stitched image. Further testing showed that all of my Canon mount lenses (Canon & Sigma) had this same slippage issue.
Working with the tech support team at Promote Control, their engineers came up with a revision to their firmware that solved this issue. This revision is the “Advanced Focus Stacking” mode that was included in firmware version 3.31 released in Oct. of 2016. You will want to download this revision into your Promote Control before attempting a Focus Stacked project. Note also that I have had it reported to me that Nikon owners have experienced the same issue. The version 3.31 resolves it for Nikon too. This link will take you to a tutorial on using the Advanced Focus Stacking mode.
Note: Promote Systems, the manufacture of the Promote Control went out of business around 2018. This device is no longer available and the Promote website is no longer available. Firmware downloads are no longer available. If you are an owner of a Promote control and need version 3.31 I still have a copy stored on my computer along with the installer program. Contact me if you would like to attempt to update your Promote Control.
After the version 3.31 firmware release I began to shoot numerous focus stacked panoramas. In Sept, 2017 at my 2017 Gigapixel Panoramic Photography Workshop, the main topic we covered was shooting Focus Stacked Panoramas. Both of my students signed up for the workshop to learn how to shoot wall mural sized panoramas that were Tack Sharp from foreground to horizon. Here is a sample of one of the photos I shot during the workshop.
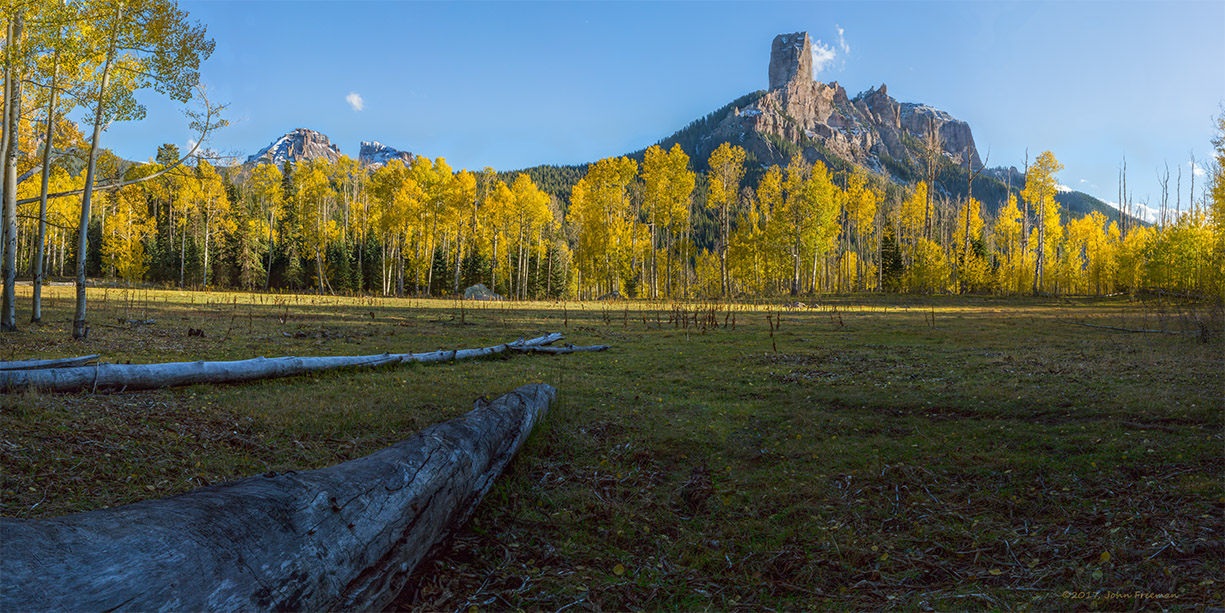
Figure 3 Deb’s Meadow, location used in filming of the movie “True Grit” starring John Wayne. The finished size of this photo is 42.8” x 85.7” @ 300dpi. (12,859 x 25,718 pixels, 331 megapixels)
The image shown in Fig. 3 is made up of 28 individual focus stacked images. Metadata is: 1/125th sec., ISO 800, 85mm focal length of my Canon 70-200mm f-2.8 lens, using Canon 5Diii full frame camera. Each focus stack is 7 focus steps with start point of 4.5 ft. and end point near the infinity mark on the scale on the lens. My goal when shooting this photo was to have the log in lower left corner perfectly in focus while maintaining perfect focus for the rest of the scene. The log was located approximately 5 ft. from my camera. The trees at far side of the clearing are about 100 yards and Chimney Peak is some 3 miles from our location. You can view a high resolution virtual tour of the image in Fig. 3 at this link:
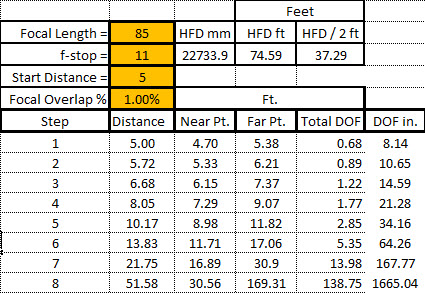
Figure 4 — Calculated focus distances for f/11 & 85mm on Full Frame Camera
Getting the focal range and number of steps set is the first hurdle. Next if you are using a Gigapan to position the camera you need to setup the Gigapan to work with the Promote Control.
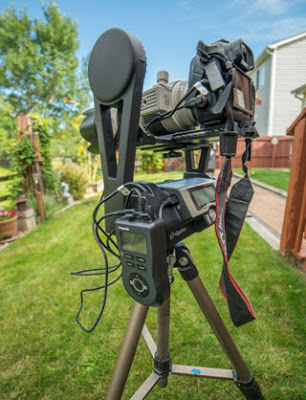
Figure 6 — Promote Control with Epic Pro, Canon 5Dii & 70-200mm f/2.8 lens.
Depending on the length of time it takes the Promote Control to sequence through the focus stack it is possible to have the Gigapan signal the Promote Control to start a sequence, wait for it to finish and automatically move to the next position. This can allow the operator to minimize the amount of time needed to shoot the entire panorama. It also helps to avoid getting confused and skipping an entire position resulting in losing the entire panorama. NOTE: This only works for relatively short focus sequences of 3-5 steps which take less than 58 seconds.
I start by pressing the start button on the Promote Control and measuring the amount of time needed to fully complete the focus stack sequence with the stop watch in my watch or phone. With sequences of 3-4 focus positions the time for the sequence is usually less than 60 seconds. The Gigapan’s “Time Exposure” timer has a maximum time of 60 seconds. If the time it takes the Promote Control to complete the focus sequence is less than 58 seconds, then it is possible to setup for fully automatic shooting. I set the Gigapan’s “Time Exposure” time to 2 seconds longer than the measured time it took the Promote Control to finish the focus sequence. This assures that the Gigapan doesn’t start move to next position before focus stack is finished. It also gives the camera time to clear the buffer to memory.
In the Gigapan Menu select:
Options
Time/Exposure
Set to 2 sec. greater than measured focus sequence time
Your Gigapan came with a variety of shutter release cables. One of those cables with fit into the Promote Control’s shutter release input. Connect the shutter release cable (provided by Gigapan) from the Gigapan to the Promote Control. This will allow the Gigapan to automatically initiate a focus stack sequence, equivalent to pressing the “Start” button on the Promote Control.
When I have completed the setup of the Gigapan and connected the cable to the Promote Control, I then initiate a “Shutter Test” from the Gigapan’s menu. If everything is connected properly, the Promote Control should start a focus sequence. Watch the screen of your Gigapan. It will display “Taking Picture…” indicating that it has started the time exposure timer. Listen for the beep from Promote Control at the end of the focus sequence. It should occur approximately 2 seconds before the Gigapan display reverts back to the main menu.
In the case where your focus stack sequence is longer than 58 seconds you will need to use the Manual Shutter mode of the Gigapan. In this mode the Gigapan does not generate a shutter signal. It only performs the movements for the panorama. For each position you will need to manually press the Start button on the Promote Control. When the beep occurs indicating the Promote Control has finished the focus sequence you will then press the OK button on the Gigapan to initiate the move to next position in the panorama.
To change to manual mode in the Gigapan Menu select:
Options
Expert Options
Shutter Mode
Set to Manual
Otherwise, in Manual mode the operation of the Gigapan is the same for setting up your panorama. You will need to set the Field of View, Start Position, and End Position as normal. It is assumed that the reader is familiar with all these functions of the Gigapan.
Post Processing of Focus Stacked Sets
I always shoot RAW format for all my work. RAW give maximum flexibility to adjust for exposure, dynamic range etc. in post processing. I also always use “Expose to the Right” when setting up my camera for the panorama. In digital photography, Exposing To The Right (ETTR) is the technique of adjusting the exposure of a RAW image as high as possible at base ISO (without causing unwanted saturation) to collect the maximum amount of light and thus get the optimum performance out of the digital image sensor. A quick search with Google for Expose to the Right will provide you with plenty of information as to why this is adventitious and how to post process your ETTR images, so I won’t spend any time on it here.
Because I use RAW and ETTR, post processing is always needed to prepare you images for focus stacking and stitching. Using Camera RAW after my exposure adjustments are done, I save the images in TIFF format. I use TIFF format because the Helicon Focus 6, PTGui and Kolor Autopano Giga programs cannot properly read the RAW file with adjustments done in Camera RAW.
I use Helicon Focus 6 to do the focus stacking. It is far faster than Photoshop and has Batch Processing which allows one to quickly process the numerous images shot during a panorama session. A neat feature is the Touchup Editor that allows you to edit out multiple images of moving objects in the focus stacked set. In the field, you almost always have some movement of tree branches etc. within the image. I save the focus stacked images to a new folder on my hard drive as TIFF files.
After the focus stacking is completed, I then use Autopano Giga to stitch the focus stacked images. PTGui can also be used. It is strictly a matter of which program you own or are most familiar with. Both will do the job.
Here are a couple more examples of focus stacked images that I have done.

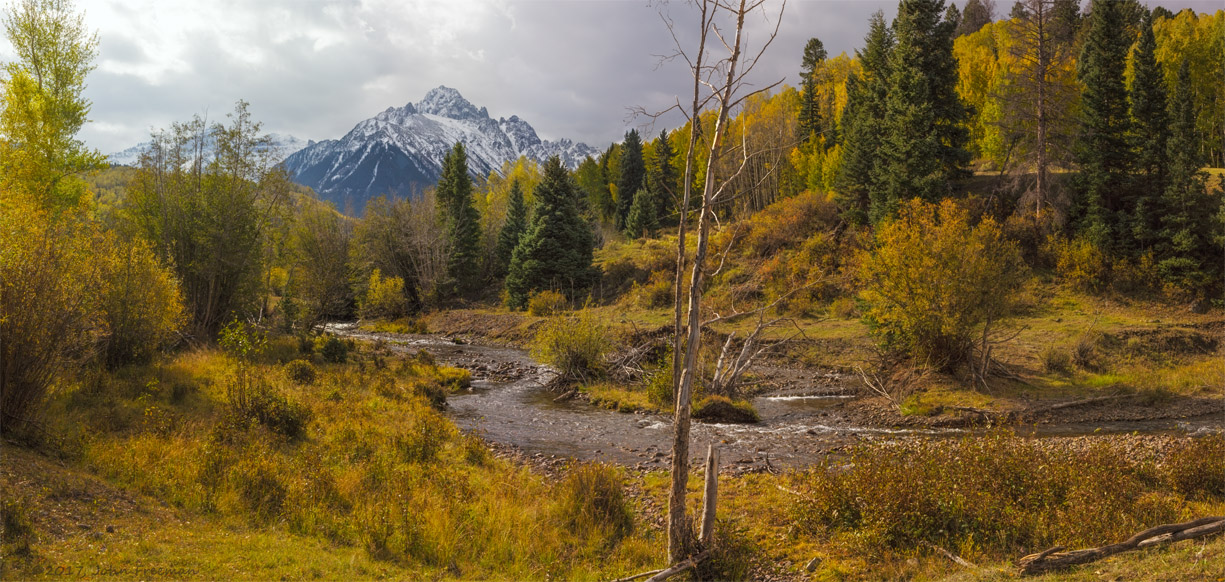
Figure 6 — Dallas Peak Through the Aspens is 32 focus stacked images each stack consisting 7 focus steps. f-11, 1/160th sec. ISO 800, 90mm. Finished size is 30.5″ x 96.4″ The Aspen Tree on the left was about 6 ft. from the camera. Gopher mounds on right were around 4 ft. Virtual tour of this image can be viewed at this link: https://abbascreationsphotography.com/Dallas_Through_the_Aspens/Dallas_Through_the_Aspens.html
Contact Info:
Feel free to contact me for more information and any questions you may have.
